Sand casting is a time-honored and versatile metal-forming technique used to create a wide variety of metal parts, from simple decorative items to complex mechanical components. If you want to learn more about the fundamentals of this process, read our article What is Sand Casting?. Creating a successful sand mold is the cornerstone of the entire casting process. This guide will provide you with a detailed, step-by-step walkthrough on how to make a perfect sand mold.
What are sand casting mold’s properties?
-
Refractoriness: is the ability to prevent the mold from flowing into the casting when pouring liquid metal into the mold.
-
Permeability: During casting process, a large amount of the generated gas needs to be released out of the mold. If not so, the casting defects can be created.
-
Strength: When a mold is subjected to external forces such as moving, assembling, or molten metal pouring, it must retain both inside and outside shape.
-
Collapsibility: sand casting molds must be elastic so that when the object is condensed, it will not be obstructed by the mold leading to warping and cracking.
-
Cohesiveness: Helps sand to retain its original shape after removing the pattern from the mold.
Required Tools and Materials
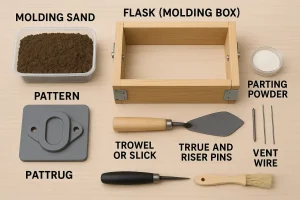
Before you begin, ensure you have the following tools and materials ready:
- Molding Sand: Also known as foundry sand, it is the primary material for the mold. Common types include oil-bonded sand, resin-bonded sand, or clay-bonded sand (e.g., greensand).
- Flask (Molding Box): Typically made of two halves: the cope (upper half) and the drag (lower half).
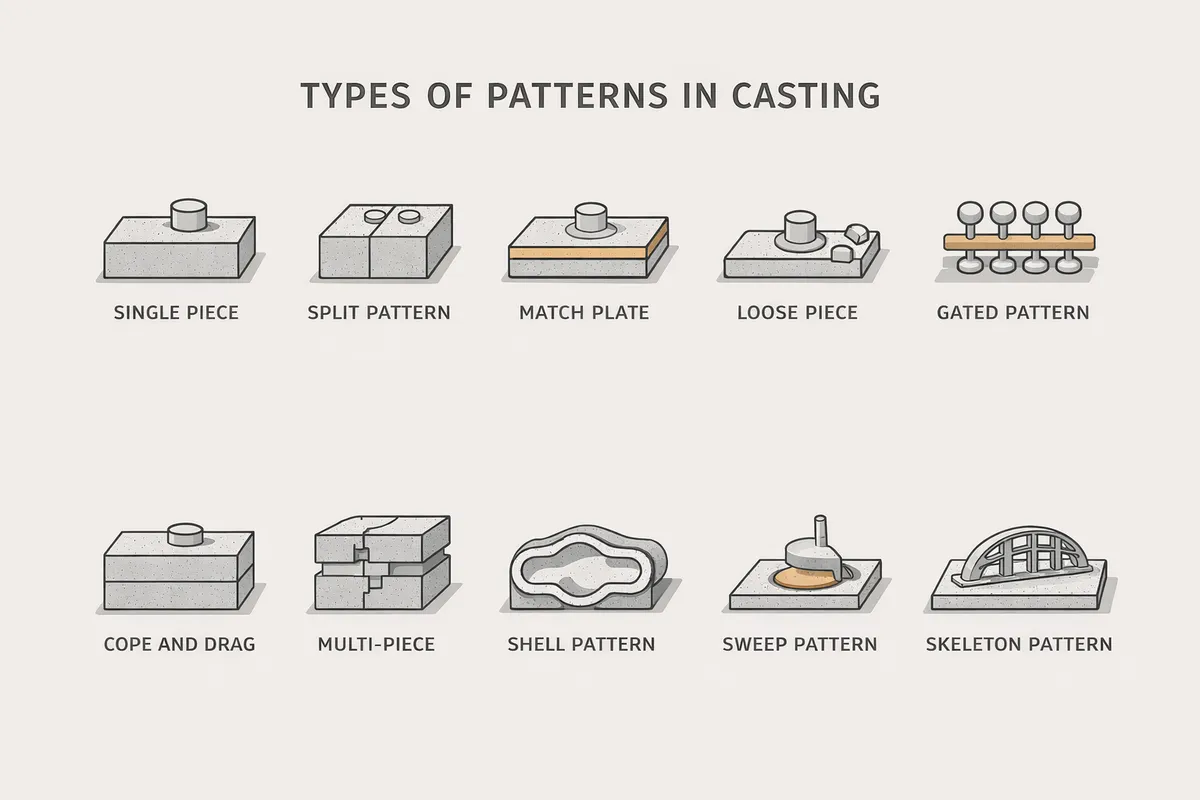
- Pattern: A model of the part you want to cast. It can be made of wood, plastic, metal, or a 3D-printed material.
- Parting Powder: Used to prevent the sand from sticking to the pattern or between the two mold halves.
- Rammer: A tool for compacting the molding sand.
- Trowel or Slick: For scraping and smoothing the sand surfaces.
- Sprue and Riser Pins: Used to create the pouring channel and riser.
- Vent Wire: For making vent holes in the sand.
- Brush: For cleaning.
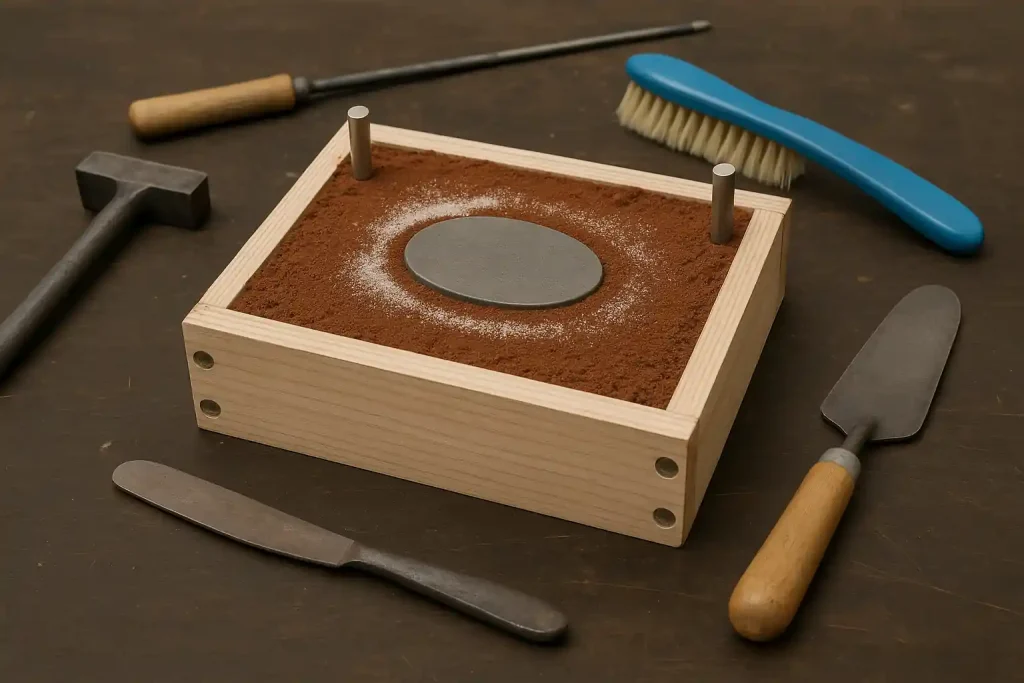
How to Make a Sand Cast Mold?
Step 1: Prepare the Drag (Lower Half of the Mold)
- Place the Flask: Lay the drag flat on a sturdy workbench with the open side facing up.
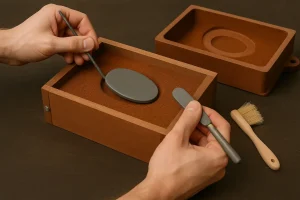
- Position the Pattern: Place your pattern securely inside the flask, typically in the center. If you are doing a single-sided cast, place one side of the pattern face-down. Use a brush to evenly dust the pattern with parting powder, especially if it has complex geometries or undercuts.
- Fill with Sand: Scoop the molding sand into the drag until it completely covers the pattern and is slightly mounded above the flask’s edge.
- Ram the Sand: Use the rammer to carefully and firmly compact the sand. Start with light taps around the pattern, then gradually work your way outward, ensuring the sand is uniformly dense. If the sand is not firm enough, the casting may have defects; if it’s too tight, it will lack permeability, leading to gas porosity.
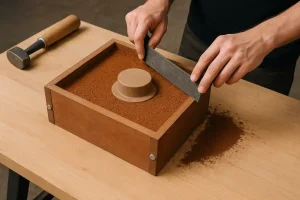
- Strike Off the Surface: Use a straightedge or trowel to scrape off the excess sand, making the surface level with the top edge of the flask.
Step 2: Prepare the Cope (Upper Half of the Mold)
- Dust with Parting Powder: Liberally and evenly dust the surface of the sand in the drag (including the exposed part of the pattern) with parting powder. This is a crucial step to ensure the two halves of the mold can be cleanly separated.
- Place the Cope: Carefully position the cope directly on top of the drag, aligning the guide pins.
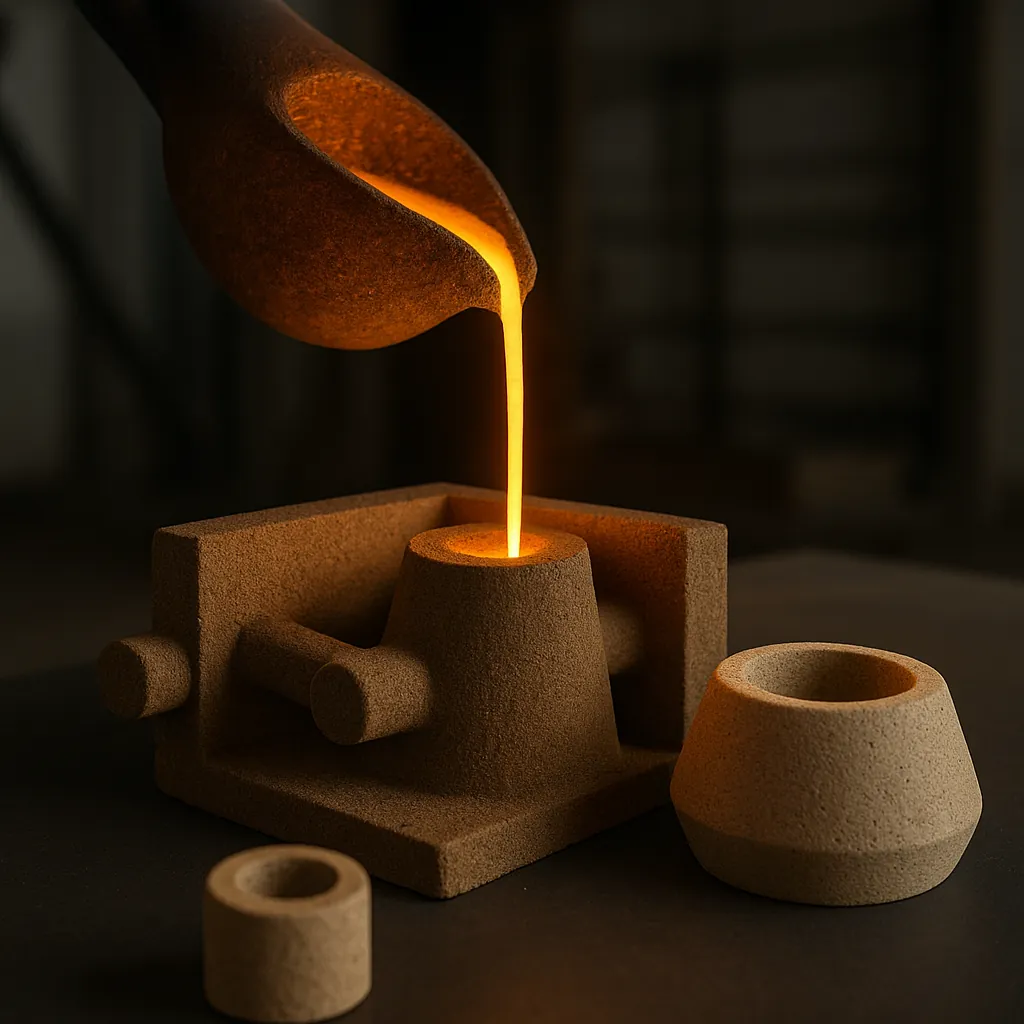
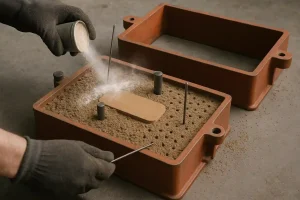
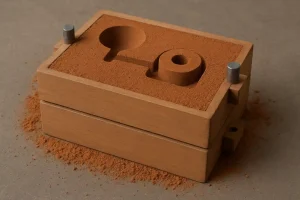
- Insert Sprue and Riser Pins: Place the sprue pin (for the pouring channel) and riser pin (for gas and material overflow) on the surface of the pattern.
- Fill and Ram: Repeat the process from Step 1, filling the cope with sand and ramming it firmly.
- Create Vent Holes: Strike off the excess sand. Then, use the vent wire to poke several small holes through the sand in the cope, making sure to go almost to the pattern but without piercing the mold cavity. These holes serve as an escape route for gases during the pour.
Step 3: Open the Mold and Remove the Pattern
- Remove the Pins: Carefully twist and pull the sprue and riser pins straight out of the sand.
- Separate the Mold: Gently lift the cope straight up and off the drag. The parting powder should allow for a clean separation, with the sand in both halves maintaining its shape.
- Extract the Pattern: You can now see the two halves of your mold cavity. Use a draw spike or another tool to carefully lift the pattern out of the sand. Be gentle to avoid damaging the mold cavity.
- Finish the Cavity: Use a small tool or brush to clean up any loose sand and smooth the edges of the mold cavity.
Step 4: Create the Gating System and Close the Mold
- Carve the Gate: In the cope half of the mold, use a tool or blade to carve a pouring basin at the top of the sprue hole. Then, carve a runner (or channel) from the base of the sprue to the mold cavity, ensuring a smooth path for the molten metal.
- Place Cores (Optional): If your casting has internal voids or holes, you can now place pre-made sand cores into the designated core prints within the mold.
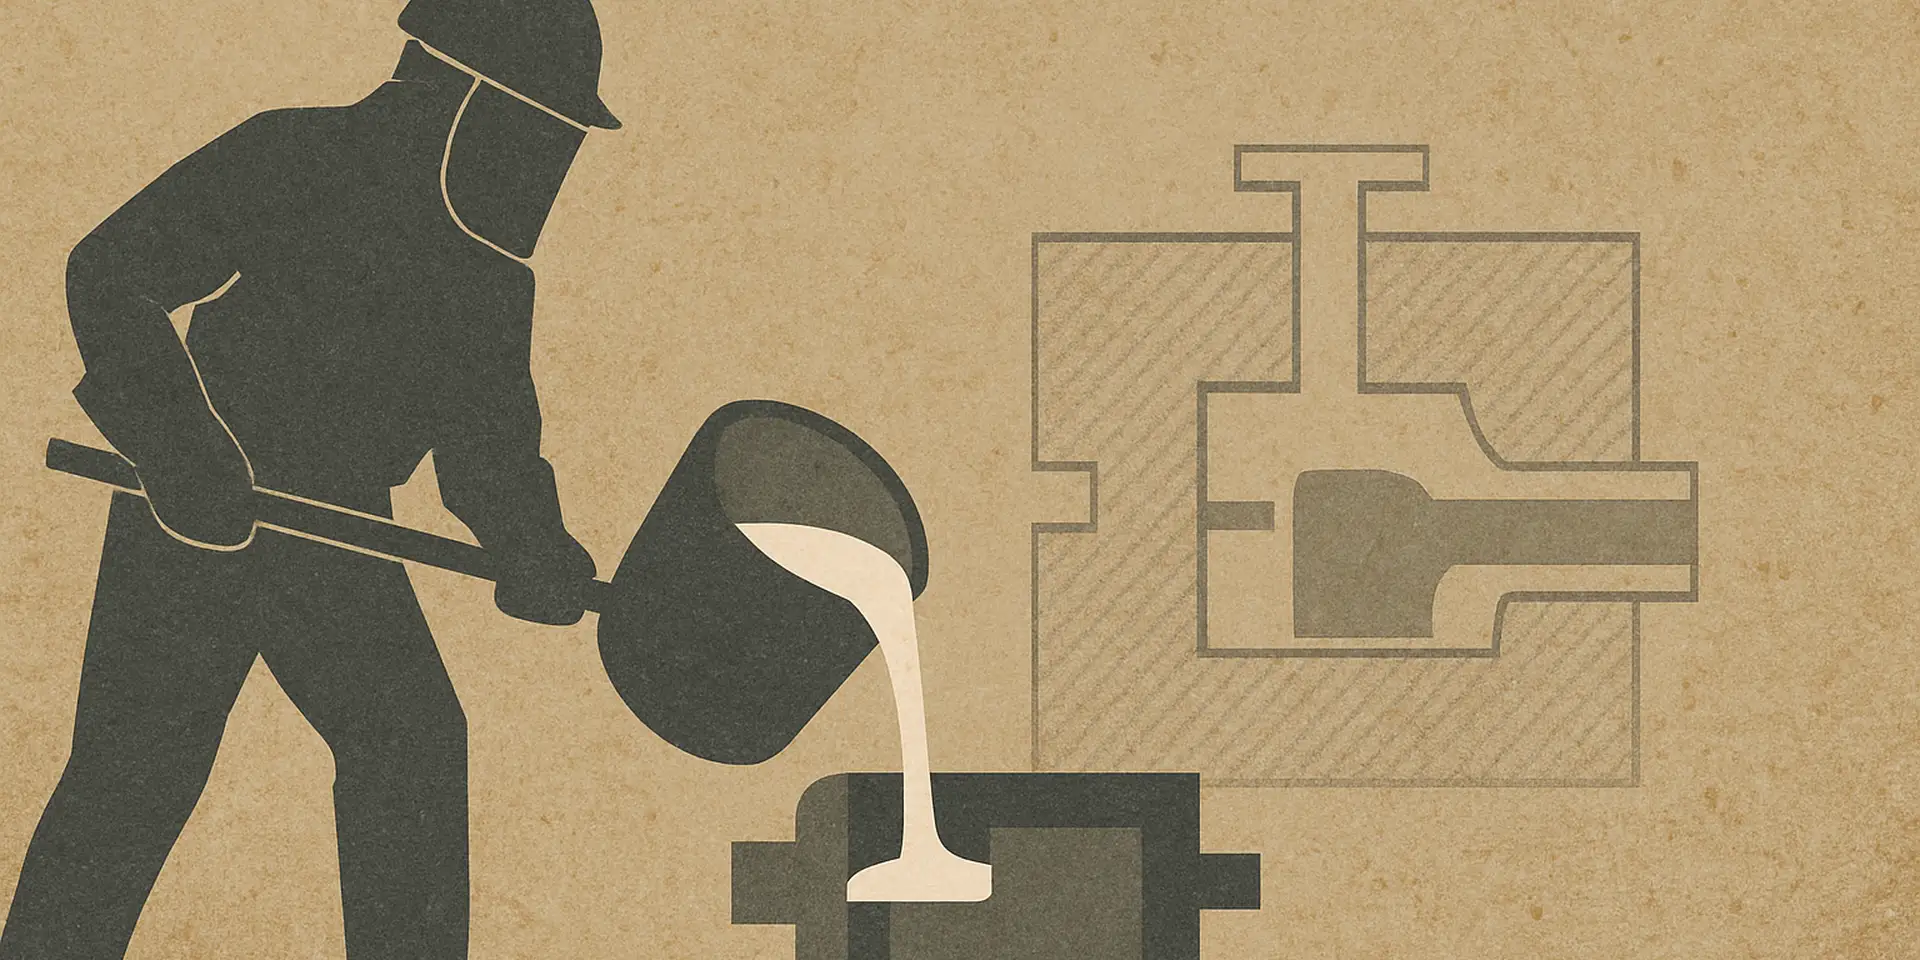
- Close the Mold: Ensure both halves of the mold cavity are clean. Carefully place the cope back onto the drag, using the alignment pins to ensure a perfect fit. You can place a weight on top or clamp the flask to secure it during the pour.
Congratulations! Your sand mold is now complete and ready for casting.
Safety Tips
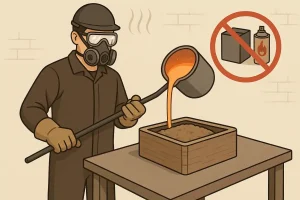
- Always wear personal protective equipment (PPE), including gloves, safety glasses, and a respirator, when working with molding sand and molten metal.
- Ensure your work area is well-ventilated and free from flammable materials before pouring.
Frequently Asked Questions (FAQs)
Q1: What kind of sand should I use? A1: The most common sand for hobbyists is greensand, which is a mixture of sand, clay, and water. It is reusable, cost-effective, and holds its shape well. For more advanced projects requiring higher strength, you may consider oil-bonded or resin-bonded sands.
Q2: My sand mold keeps falling apart. What am I doing wrong? A2: This is a common issue. It usually means the sand is either not compacted enough or is too dry. Make sure you are firmly ramming the sand, especially around the pattern. If using greensand, add a small amount of water to increase its cohesion.
Q3: What causes defects like rough surfaces or gas holes in my final casting? A3: A rough surface is often caused by inadequately compacted sand, or sand that is too coarse. Gas holes (porosity) are typically caused by trapped gases. To prevent this, ensure your mold has enough vent holes and that the sand has good permeability. Proper gating system design also helps.
Q4: How do I know if I’m ramming the sand correctly? A4: The sand should feel firm and solid to the touch after ramming. A good test is to press your thumb into the sand; if it leaves a deep, soft indentation, it needs more ramming. If it feels as hard as a brick and your thumb barely makes a mark, it might be too tight.
Q5: Can I do sand casting at home?
A5: Yes, absolutely. Sand casting is a great hobby or small-scale project to do at home. You’ll need basic tools (like a flask, sand, and a melting furnace) and proper personal protective equipment. Starting with small projects, such as casting simple lead or aluminum parts, is the best way to master the technique. Always be sure to follow all safety procedures and work in a well-ventilated area before you begin.
Ready to Start Your Casting Project?
Now that you know the fundamentals of making a sand mold, it’s time to bring your designs to life. Whether you need a simple prototype or a full production run, our team of experts can help.
Contact Us Today to Get a Free Quote